Until we have a reliable solution for wireless electricity, cables will always be necessary. Although it’s unfortunate, robots will have to remain wired… at least for the next couple of years.
So we have to deal with cables properly (especially the annoying ones, like the ones that go from the robot controller to the robot wrist). As a robotic device manufacturer, this is one of our top concerns in terms of reliability. Here’s how to do proper cable management on your robot.
What’s in a Cable Anyway?
Cables that link the robot tool to the robot controller generally have two functions: transmitting electricity, and establishing communications between the devices.
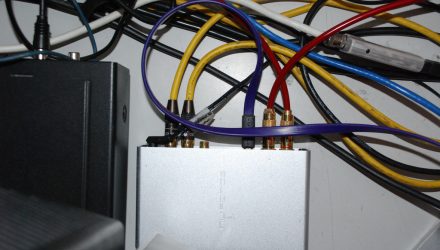
Within the cables are different wires that accomplish these two functions. There are usually two wires dedicated to electricity, a couple for communication, a bare wire, and a shield over all of them.
Each of these components has a crucial role to play in the robotic device.
![]()

Most industrial wirings are designed for static uses or for minor flexion – not for the amount of twisting that robots can perform. Since they weren’t built to turn 360 degrees here and another 180 degrees there, robotic applications raise the risk that one of the wires or the shield itself will break.
A broken wire or shield results in a loss of communication or a loss of current, which (usually) causes the robotic device to stop – obviously not something you want to have happen. That’s why you need to do cable management: to avoid breaking your cables.
The Basics of Cable Management
The principle of cable management is to place cables in such a position that they go through as many cycles as the robot without breaking.
To achieve that, you must do two things:
- Respect the natural curvature of the cable
- Do not pinch the cable
There are three ways to approach cable management: general hardware, dedicated cable management products, or a custom setup.
General Hardware
In the subsections below, we’ll cover the most common hardware solutions and some best practices.
Zip Ties
Zip ties are a great solution, but only if they don’t pinch the wires. Squeezing a cable against the robot framing with a zip tie is a no-go. If you do use zip ties, make sure to use two of them: attach one to the robot frame, and use the other to make a loop for the cable to slide through.
Velcro
Out of all the solutions, velcro is probably the best value. You can get a couple of bands of velcro, fix them here and there, and you will have good cable management. Just make sure the cable always loops naturally and is never pinched, and you’re good to go.
Fabric Sleeves
Some of our customers used fabric, such as neoprene, to create a sleeve around the robot frame for a sleek, elegant solution. Simply slide the cable through the sleeve so it stays in place while the robot is operating. Again, as long as you keep a natural loop in the cable, you’ll be fine.
Follow the UR cable management thread in the DoF community of experts.
Dedicated Cable Management Products
Many companies provide robot-specific solutions. The principle is pretty straightforward: a flexible housing is fixed on the outside of the robot and the cables are slid through it.